The Controller is finally finished! It has taken me all summer to do it, mainly because of classes and the new job... which by the way also helped me build the controller.
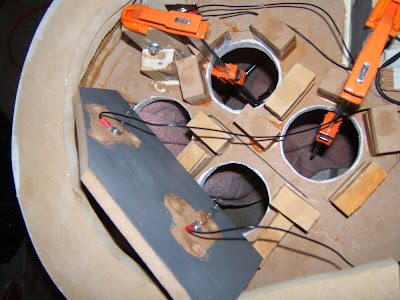
Button Mounting and wiring. The mounting was a bit tricky getting all these clamps in while it dried... but I somehow made it work.
 This one shows the clamping of one of the bumper mounts. Its hinged with a single spring/ bolt at the other end.
Soldering for the SNES controller card, actually quite easy.


I used these screw plates to connect each button so I could disconnect each seperately for potential repair/ maintanence.


 I used stencils made on the computer and cut on a machine to get the lettering just right. Turns out that the SNES font is almost identical to Hattenschweller, I think thats how its spelled. Its a standard font italicized. I also made a few stencils for the skateboards I'm making (the ones that say "meret"), and the Lost logo for some potential surfboard airbrushing.
 I also stenciled out the circle for the A B X Y buttons, came out pretty clean.
 I had originally tried a rubbery brush-on material for the start select, but it stuck too much on the sides when pressed.
 You can see the contacts are just springs, and the other side of the contact are metal plates.


 I used stencils made on the computer and cut on a machine to get the lettering just right. Turns out that the SNES font is almost identical to Hattenschweller, I think thats how its spelled. Its a standard font italicized. I also made a few stencils for the skateboards I'm making (the ones that say "meret"), and the Lost logo for some potential surfboard airbrushing.
 I also stenciled out the circle for the A B X Y buttons, came out pretty clean.
 I had originally tried a rubbery brush-on material for the start select, but it stuck too much on the sides when pressed.
 You can see the contacts are just springs, and the other side of the contact are metal plates.


